4/12/12: Hi All! I’ve now updated the recipe- please see toward the end of the post.
I’ve been inspired to make these from quite a few bounty bar recipes however most bounty bar recipes I have seen use margarine (not good eats). So I wanted to show you a recipe for bounty bars made with healthier and more nutritious ingredients (with vegan alternatives) and no artificial or fake foods insight! You can also choose to use ingredients that are fair trade and organic (which original bounty bars are neither) and make them as decorative as you like to indulge by yourself (or share with your loved ones)!
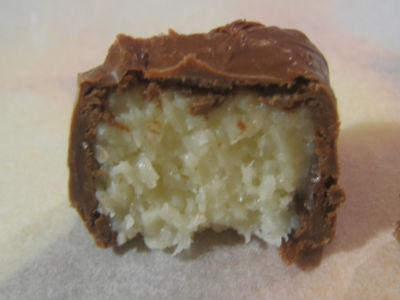
Why make your own chocolate? Apart from the fact that they taste pretty darn good, you also have the control to choose the ingredients you want to use (and make them healthier than commercially produced candy). I like to make these because I know what is in them and I can use much better quality ingredients than you could get in bought bounty bars. Another great reason to make these is because we all need a treat every now and again. It’s easier to stay healthy when we don’t deprive ourselves of treats, especially those made from wholesome ingredients.
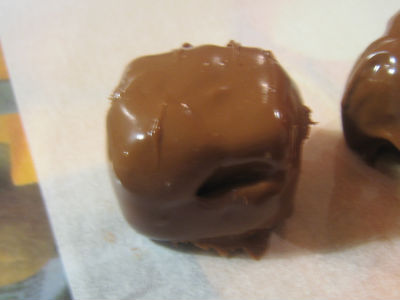

See below red text for the updated recipe…
Makes: ~36 square pieces
Ingredients:
- 1 can organic coconut cream or a coconut meat and coconut water from 1 young coconut or 300ml organic dairy cream (I used Coconut Cream)
- 40g organic coconut oil or 50g organic unsalted grass-fed butter (I used the Organic Butter) (The oil/butter holds the coconut squares together and helps the mixture set)
- 1 t. vanilla extract or vanilla beans
- 100g organic desiccated coconut
- sweetener: 2 T. organic rapadura sugar or 2 T. maple syrup or 3 dates (blended with a bit of melted coconut oil or butter to form a smooth paste) (I used Rapadura Sugar)
- 200g chocolate*, to be melted
*I used Green and Blacks Organic Milk Chocolate- but you can use any kind you like. You could also use Cocolo Chocolates (which are soy emulsifier free) or try using dark chocolate instead of milk.
(I added what I used in the recipe in the brackets; (Coconut Cream, Butter, Rapadura etc).
Directions:
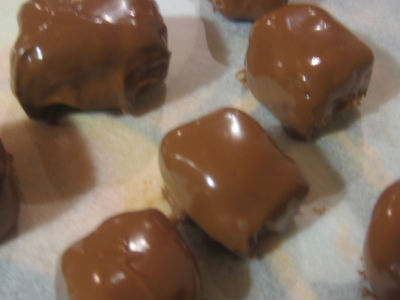
Heat coconut cream and coconut oil (or alternatives ingredients) and sweetener. Heat until the sweetener and oil dissolve into the cream. Stir in the vanilla.Turn off the heat and stir in the coconut. You want a doughy consistency and for it to not be watery at all.Pour into a greased and lined square tin (you can use butter or coconut oil to grease it). Press down with the back of a spoon until the mixture is quite compact into the tin and does not come apart.Cover the container with a plate or foil and place in the fridge overnight to set.When set (it should be quite firm) cut into cubes and place back in the fridge (until after the next step).Temper your chocolate (see below for details on how to do that). This helps your chocolate get a nice crack and shine and to help set the chocolate on your coconut squares (and it makes sure you don’t burn it).Cover your coconut squares with chocolate: place your coconut squares in the middle of the bowl of chocolate. Cover the square with chocolate using a big spoon to make sure it is completely covered. Lift the chocolate covered coconut square of the bowl. Shake a bit of excess chocolate off.Place your chocolates on a piece of baking paper until set. Enjoy!
Homemade Bounty Bars (With Real Food Ingredients)
Updated Recipe: 4/12/12
Ingredients:
- 1 cup (250 ml) of full-fat coconut milk
- 2 C. shredded coconut (it was about 130 g coconut)
- 2 Tbsp. coconut oil or butter (heaped)
- 1/4 C. – 1/2 C. maple syrup
- Optional: 1/2 tsp. non-gm lecithin granules (this just helps to emulsify the coconut milk & oil together- it is an optional ingredient).
- 200 g dark chocolate
How to:
- In a saucepan add the coconut milk, coconut oil, maple syrup & lecithin (if using). Heat on medium- low and stir until it all it dissolves together. Leave to cool to room temperature.
- Stir in the shredded coconut. Pour this mixture into a tin lined with wax paper.
- Leave to set in the fridge. When set (it should be fairly firm), slice into squares and then place in the freezer to completely harden (this makes it easier to handle and to keep them stable when covering in chocolate).
- Temper your chocolate (see below for details on how to do that). This helps your chocolate get a nice crack and shine and to help set the chocolate on your coconut squares (and it makes sure you don’t burn it).
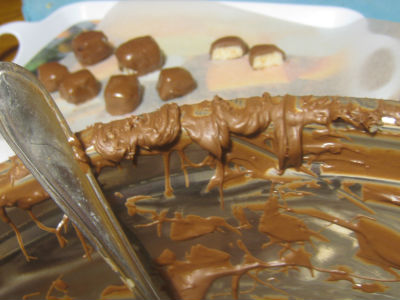
- Cover your coconut squares with chocolate: place your coconut squares in the middle of the bowl of chocolate. Cover the square with chocolate using a big spoon to make sure it is completely covered. Lift the chocolate covered coconut square of the bowl. Shake a bit of excess chocolate off on the inside of the bowl.
- Place your chocolates on a piece of baking paper until set. Enjoy!
Tempering Chocolate- You Will Need:
- a metal bowl (wider than the saucepan)
- a smaller bowl, filled with water and ice
- a saucepan, filled with 3 cm of water
- a metal or plastic spoon (not wooden)
- a cooking thermometer
- your chocolate of choice, chopped
How to temper the chocolate:
(Here’s a great video on how to temper chocolate):
- Place your water onto a boil then turn down to a simmer and turn off the heat.
- Place your metal bowl over the now hot water (and heat turned off) and add the chocolate. Stir the chocolate with your metal spoon until it melts. Put your thermometer in and make sure it doesn’t go above 48 degrees Celsius (118 F).
- When it reaches 48 take it off the hot saucepan and put it in your ice water bowl. Keep stirring. Wait till it cools down to 26 degrees.
- When it has cooled down, turn your saucepan on again and place your metal bowl over the saucepan, now with the heat on. Put the thermometer into the chocolate and wait till the temperature of the chocolate reaches 48. When it’s at that temperature, turn off the heat. Your chocolate is now ready to use!
- Simply place your coconut square into the chocolate with a fork and completely cover it. Tap your fork with the covered coconut square against the side of the bowl so excess chocolate comes off. Then place your chocolates on a lined tray until the chocolates harden!
Tips for tempering chocolate:
Make sure you don’t get any water or steam in your chocolate at any stage while tempering. Water= chocolate death!
Use only metal or plastic spoons to stir the chocolate.
If you let your chocolate go over 48 degrees C then its gone- you can’t use it any more.
It’s a good idea if you have one to use a thermometer to test the temperature when you’re heating a cooling the chocolate. I used a digital thermometer.
Having said all that, you don’t really need to temper the chocolate- but it does help to coat the coconut squares properly.
Your Thoughts?
What do you think of this recipe? Don’t you think it looks delicious? How do you think I could health-ify it? I want to know what you think- share your thoughts with me and the world below!
This blog post was submitted to Amy’s carnival called Slightly Indulgent Tuesday (May 18th)., Real Food Wednesday May 19th.

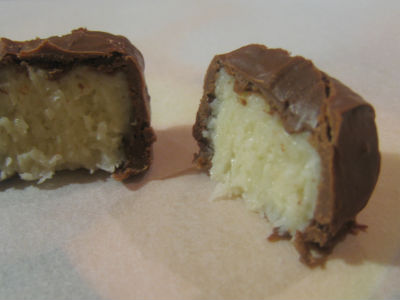
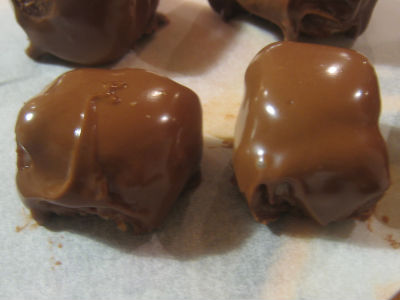




{ 36 comments… read them below or add one }
Michelle, these look absolutely delicious! I will have to make them sometime! :)
You should, they are pretty yummy! The good thing is they make a whole lot (OR you can halve the recipe) and make them all and then freeze the rest for other times you need a chocolate fix! I was going to do that but unfortunately a little sister of mine may have eaten them all except one or two haha. Well I’m glad she liked them anyway!
Ooo, tasty! I love love love coconut and especially in treats! Do you think it would taste good with bitter chocolate? (I like bitter chocolate – I know not everyone does…)
~Aubree Cherie
Hi Aubree.
Oh yeah it would be great with bitter choc! (Thats how the original Bounty Bars are made with Bitter Chocolate). I just got milk choc because I thought it would temper better (but I don’t think it really makes a different). But Dark chocolate would be great! Try it and tell me what you think?
yum, this looks amazing! It would be great with an almond pressed into each piece, before covered in chocolate! I’ll have to try that.
Nora,
That sounds divine! I’ll have to make them with almonds next time, great idea!
I wonder how long you can keep these fresh… do you store these in the fridge? thanks! :-) love the recipe btw!
Hi Leanne.
Well I would say if stored in the fridge, up to two weeks. But to be honest, they haven’t lasted that long! You could also freeze them for a longer period too.
Hi, I stumbled upon your blog in my quest to find the recipe for home made Bounty. Anyway, I burnt my chocolate once and my mom found a way for it not to go to waste. It actually makes for good hot chocolate milk.. get this.. it’s also good with coconut milk instead of cow milk. You need to try it. Just boil coconut milk and then add your burnt chocolate. Don’t do it if your chocolate is really burnt to the extent that it doesn’t taste like chocolate anymore. I’m talking about burnt chocolate that can’t be melted anymore.
your bounty looks delicious. thanks for the advices :)
Hello,
I’ve been hoping, wishing, waiting for a homemade vegan version of Bounty bars. So thank you! :)
I can’t wait to make this recipe and am elated to hear they can be frozen too.
Cheers,
Nina
Sorry, one question, what size can of coconut cream did you use? I can buy 300ml and 400ml cans here in Australia.
Thank you :D
Hi Nina. I think it may have been 400ml, but I will have to double check and get back to you. No worries :)
Hi Nina. I’m glad you found my recipe and I hope you enjoy it.
Michelle.
Hi Michelle, I’m about to make your homemade bounty bars so will let you know how I get on. I am following up on a question from Nina a few months ago regarding the size can of coconut cream. All I have found is a 250ml carton in sainsbury’s, no where else stock’s coconut cream so I’m going to use 400ml as thats what you thought you used and most standard sized tins in the UK are 400ml but would be really grateful if you could confirm for sure what size can you used. Do you think 1 carton of 250 ml would not be enough or 500ml, 2 cartons, too much? Thanks so much!
Hi Tom. Sorry for the late reply. I will have to double check for you the size of coconut cream I used. Though I think it may have been a 250ml can.
what did I do wrong?
Hi Michelle, so I’ve followed the recipe exactly as described
400ml coconut cream
40g coconut oil
2 T (tablespoon) sweetener, I used agave nectar as I don’t eat refined sugar
1 t (teaspoon) vanilla extract
but fear something is wrong as after the coconut cream, oil & sweetener had smoothed down & I stirred in the vanilla I added the desiccated coconut and it couldn’t be any further from a doughy consistency and was like a milk shake (watery which I didn’t want). Don’t understand how so much liquid with only 100g desiccated coconut could be doughy? Any ideas what I did wrong? Thanks
update – I put it in the fridge and it did firm up and but soft to touch so I’m putting in the freezer overnight, taking it out in the morning then will leave it in the fridge till I cover in chocolate
Hi Tom. I think you may have maybe used a bit too much coconut cream. Maybe decrease the liquid or increase the dessicated coconut?
I’m glad it did end up firming up after it being in the fridge. How did it go the next day?
Oh Wow! Thank you for leaving the message about this gorgeuos bounty bar recipe on my blog. When I first opened this page and saw that first picture I was blown away. It looks just like my real beloved bounty bar! I will try these out in the next few weeks and let you know.
Hi Sleepinghorse! No problem! I’m glad you like it! Please let me know how it goes! Thanks for stopping by!
Have just made this and put them into the fridge to set. I have done the same thing as Tom and used a 400ml can of coconut cream, so I wondered why it was so liquidy and not doughy at all! I added a truckload more coconut to get it to a dough like consistency, so hopefully all is not lost. Will try 250ml of cream next time and see how we go. If the unset mixture is anything to go by, this recipe will be a huge success in this coconut loving house!
Hi Bianca. I think 250ml-300ml would be closer to the amount I used (I mentioned 300ml in the ingredients section). I’m glad the unset mixture tastes good and I hope it tastes even better when it’s set. Thanks for letting me know how it went :)!
Unfortunately, the mixture didn’t firm up, but i was able to roll them into balls and dip them into some dark chocolate anyway! My little ‘failures’ are pretty darn good, so I can imagine this recipe will be amazing once I get the recipe perfected!
P.S. I have baby brain at the moment. Seeing 300ml in the ingredient section of the recipe should have made sense to me, but I just grabbed a can of coconut cream without even looking at the mls!
I made these and had a little trouble. Firstly I used dark 70% cocoa chocolate and it wasn’t sweet enough. Then I used 1 can coconut cream but once the coconut was added it was too moist. My coconut cream was a 400ml can and I am wondering if it should have been the same as the alternative you mentioned, i.e. 300ml. So then I added extra coconut and ended up adding too much. I can see that now from your photos. And because it was too coconutty, extra coconut fell off in the chocolate and made it hard to roll the bounty in. I think me not tempering the chocolate was a mistake but I don’t have a thermometer.
Sorry, I don’t feel I did these beautiful looking things justice. I promise to try again and do it properly next time.
Can you confirm it should be 300ml coconut cream?
These look awesome I’m do giving them a try :-) have you made cherry ripe bars before? Im looking for that recipe also
Thanks Kerryn! I hope you like them! I have a healthy version of cherry ripe here: http://healthfoodlover.com/hfl/2012/01/recipe-healthier-homemade-cherry-ripe/
I think this is awesome. I am a big fan of organic coconut oil and real raw butter as well as delicious young coconuts! Thanks so much for sharing this wonderful and practically guilt free recipe! Can’t wait to try it! Yummy! :)
Hi Dal. Oh thank you! Thanks for stopping by and I hope you like it!
I made these and was very disappointed as they were soup, I added more coconut but they also weren’t sweet at all. They only tasted like coconut oil. Not even coconutty but oily. I used full fat coconut milk as that is what I thought you meant, but there is also a package of creamed coconut I found (not a liquid). So maybe that would work but with so many alternatives there is no way to get any consistent results with this recipe.
Hi Amanda. I’m so sorry it didn’t work out for you! I’m planning to revise the recipe this weekend!
Hi from the US… I stumbled upon your site and this yummy recipe. I’m going to try it as soon as I transfer your measurments into one’s that I’m familiar with… (there must be charts for that). I should have paid more attention in Math class. ;-)
Hi Victoria. Awesome! Well I think this may help: http://www.convert-me.com/en/convert/cooking/
I’d love to know how the Bounty Bar recipe goes for you!
Hi,
I tried the adjusted recipe added 2 extra tablespoons of the coconut and it was perfect for us. I will make them again, thankyou, they were WONDERFUL.
Hi Beck.
I’m so glad you found a way for the recipe to work for you! Thanks for sharing your adaptation :)
Just saw the same recipe here http://www.healthyeah.co.nz/1/post/2013/08/easy-homemade-bounty-bars-with-real-food-ingredients.html
Thank you for letting me know Kate!
{ 1 trackback }